


Building Your Own Google Docs: Crafting a Dynamic Flutter Clone!
A Step-by-Step Guide to Developing a Dynamic Google Docs Clone with Flutter!


Introduction
Hey everyone, I am Hasnain Makada and I am currently working as an Elite Junior Flutter Dev. at Showwcase. I also have an Open source project for my open-source community named Open-Source-With-Hasnain where I provide beginner-level to intermediate resources for beginners of all tech stacks. I also write blogs at Hashnode and Showcase as well where I mainly cover DevOps and Flutter.
This blog is going to be a step-by-step guide on how to build a google docs clone from scratch using Flutter, if you don't know what is Flutter, then let me give a general overview of what Flutter is.
What is Flutter?
Flutter is a cutting-edge open-source UI software development toolkit created by Google that empowers developers to craft visually stunning, high-performance applications for multiple platforms using a single codebase. With its robust set of tools and widgets, Flutter has gained immense popularity among developers worldwide for its ability to streamline the development process and deliver a consistent user experience across iOS, Android, web, and desktop platforms.
Now that we are done with the general overview of Flutter, Let's begin building the clone 🔥
Getting Started
Firstly we are going to create the project inside your machine
Run the below command 👇
flutter create google_docs_clone
For providing a Google sign-in facility we are going to install the google_sign_in package here, it is also simple to use and not that much complex to implement 👇
flutter pub add google_sign_in
For state management, we are going to install riverpod here, as it is the easiest state-management solution 👇
flutter pub add flutter_riverpod
Note that this is just the starting of the project, so based on the necessity we'll add more dependencies later on
Now try to run the project on the web first by running the below command 👇
flutter run -d <browser-name> --web-port=3000
Now you might think that is why I specified the web port here, we'll discuss this when we will start building the backend
Now after the project runs successfully on the web, Test it on Android as well and we're good to move to the next part of this clone.
Building the Backend
For building this clone, we'll need a sustainable backend on which we can rely and for that, we will use Node and Express for making the whole backend of this app.
We're also going to use MongoDB as a NoSQL database here for storing and retrieving documents which we store inside it.
Create a new folder named server inside the main folder of the project, this directory will contain all the javascript code which we are going to need throughout the project.
Now run the below command inside the server directory 👇
npm init -y
This will initialize the directory as a node project.
Now we are going to use express.js here with which we can easily perform all the functions and also it provides us with some additional features as well, we'll look more into it in the later part of this blog. We are also going to use Mongoose for efficient connectivity with our MongoDB database
Install the Express and Mongoose dependencies
npm install express -g // First run this

npm install mongoose -g // Then this
For the development purpose, we are going to use nodemon as it will provide us with fast refresh inside the server
npm install nodemon --save-dev
Now after installing all the dependencies, create and test the server. Paste the below code inside the index.js file 👇
const express = require("express");
const mongoose = require("mongoose");

const app = express();

const PORT = process.env.PORT | 3001;

app.listen(PORT, "0.0.0.0", (req, res) => {
  console.log(`Connected to http://localhost:${PORT}`);
});
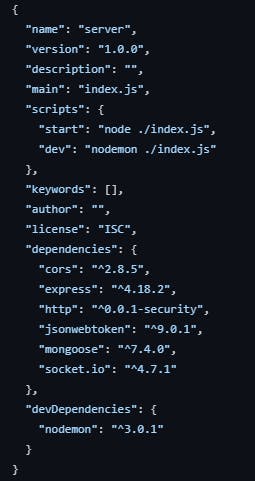
Make the changes inside scripts in the package.json file
Then run the below command inside the terminal 👇
npm run dev
and go to localhost:3001
Now if you notice then while running the Flutter web app we specified the 3000 port and when we are running the backend server we have specified the 3001 port so that it gets easily distinguishable from each other and doesn't throw any errors to us.
Now that we have built the server, Let's work on the sign-in part 🔥
Google Sign in using Flutter
Implementing the Google sign-in part is the second most important thing in this app, because how will we distinguish each user's documents and data they have put? So for this, we have to register our app inside the cloud console and then proceed, so I suggest you watch the below youtube video 👇
We will now work on the login button using the Google logo, so create a ../lib/screens/login_screen.dart file inside the screens folder, you might have to create the screens folder inside the lib folder.
And paste this code inside the login_screen.dart file.
import 'package:flutter/material.dart';
import 'package:flutter_riverpod/flutter_riverpod.dart';
import 'package:google_docs_clone/utilities/colors.dart';

class LoginScreen extends ConsumerWidget {
  const LoginScreen({super.key});
@override
  Widget build(BuildContext context, WidgetRef ref) {
    return Scaffold(
      body: Center(
        child: ElevatedButton.icon(
          onPressed: () {
               // Code to trigger sign in
          },
          icon: Image.asset(
            'assets/images/g-logo.png',
            height: 20,
          ),
          label: const Text('Sign in with Google'),
          style: ElevatedButton.styleFrom(
            backgroundColor: kWhiteColor,
            minimumSize: const Size(150, 50),
          ),
        ),
      ),
    );
  }
}
Now in the above file, we have used the consumer widget which is provided inside the fluter_riverpod package and it will provide us with fast UI builds based on the change of data.
Create a ../lib/utilities/colors.dart file as well and it will contain all of the colors which we are going to use throughout the app.
import 'package:flutter/material.dart';

const kWhiteColor = Colors.white;
const kBlackColor = Colors.black;
const kRedColor = Color.fromARGB(255, 255, 17, 0);
const kBlueColor = Color.fromRGBO(26, 115, 232, 1);
var kGreyColor = Colors.grey.shade800;
We will create two models here from which we are going to get data and errors throughout the app.
Create ../lib/models/error_model.dart file and paste this below code 👇
// ignore_for_file: public_member_api_docs, sort_constructors_first
class ErrorModel {
  final String? error;
  final dynamic data;
  ErrorModel({
    required this.error,
    required this.data,
  });
}
Then create ../lib/models/user_model.dart file and paste this below code 👇
import 'dart:convert';

class UserModel {
  String name;
  String uid;
  String email;
  String profilePic;
  String token;

  UserModel({
    required this.name,
    required this.uid,
    required this.email,
    required this.profilePic,
    required this.token,
  });

  Map<String, dynamic> toMap() {
    return <String, dynamic>{
      'name': name,
      'uid': uid,
      'email': email,
      'profilePic': profilePic,
      'token': token,
    };
  }

  factory UserModel.fromMap(Map<String, dynamic> map) {
    return UserModel(
      name: map['name'] ?? '',
      uid: map['_id'] ?? '',
      email: map['email'] ?? '',
      profilePic: map['profilePic'] ?? '',
      token: map['token'] ?? '',
    );
  }

  String toJson() => json.encode(toMap());

  factory UserModel.fromJson(String source) =>
      UserModel.fromMap(json.decode(source) as Map<String, dynamic>);

  UserModel copyWith({
    String? name,
    String? uid,
    String? email,
    String? profilePic,
    String? token,
  }) {
    return UserModel(
      name: name ?? this.name,
      uid: uid ?? this.uid,
      email: email ?? this.email,
      profilePic: profilePic ?? this.profilePic,
      token: token ?? this.token,
    );
  }
}
Now create a ../lib/repository/auth_repository.dart file which will contain all the login and signup logic with the help of Riverpod. Paste the below code inside it 👇
import 'dart:convert';

import 'package:flutter/cupertino.dart';
import 'package:flutter_riverpod/flutter_riverpod.dart';
import 'package:google_docs_clone/constants.dart';
import 'package:google_docs_clone/models/ErrorModel.dart';
import 'package:google_docs_clone/models/UserModel.dart';
import 'package:google_docs_clone/repository/local_storage_repository.dart';
import 'package:google_sign_in/google_sign_in.dart';
import 'package:http/http.dart';

final authRepositoryProvider = Provider<AuthRepository>(
  (_) => AuthRepository(
    googleSignIn: GoogleSignIn(),
    client: Client(),
  ),
);

final userProvider = StateProvider<UserModel?>((ref) => null);

class AuthRepository {
  final GoogleSignIn _googleSignIn;
  final Client _client;
  AuthRepository({
    required GoogleSignIn googleSignIn,
    required Client client,
    required LocalStorageRepository local_storage_repository,
  })  : _googleSignIn = googleSignIn,
        _client = client;

  Future<ErrorModel> googleSignIn() async {
    ErrorModel error = ErrorModel(
      error: 'Some unexpected error occurred.',
      data: null,
    );

    try {
      final user = await _googleSignIn.signIn();
      if (user != null) {
        final userAcc = UserModel(
          email: user.email,
          name: user.displayName ?? '',
          profilePic: user.photoUrl ?? '',
          uid: '',
          token: '',
        );
        var res = await _client.post(
          Uri.parse('$host/api/signup'),
          body: userAcc.toJson(),
          headers: {
            'Content-Type': 'application/json; charset=UTF-8',
          },
        );

        switch (res.statusCode) {
          case 200:
            var newUser = userAcc.copyWith(
              uid: jsonDecode(res.body)['user']['_id'],
              token: jsonDecode(res.body)['token'],
            );
            error = ErrorModel(error: null, data: newUser);
            _localStorageRepository.setToken(newUser.token);
            break;

          case 201: // user already exist
            error = ErrorModel(error: null, data: userAcc);
            break;

          default:
            error = ErrorModel(
              error: "Received a status code of ${res.statusCode}",
              data: null,
            );
            break;
        }
      }
    } catch (e) {
      error = ErrorModel(
        error: e.toString(),
        data: null,
      );
    }
    return error;
  }
}
Let's move to the server part inside which we will take this information from the user side and store it inside the MongoDB database.
Storing user info inside MongoDB
We now have to create a MongoDB project inside our cloud console and for that, I suggest you should check out the resource below 👇
After you've set up all the properties, you'll get a driver link to connect your application to your MongoDB cluster, something like this 👇

Make sure to store the username and password in a secure file as with the help of it, we will be able to connect.
Then go to index.js and paste the below code for connecting to the cluster 👇
const DB_CONNECT = `mongodb+srv://${username}:${password}@cluster0.a3fbatx.mongodb.net/?retryWrites=true&w=majority`;

mongoose
  .connect(DB_CONNECT)
  .then(() => {
    console.log("Connection succesfull");
  })
  .catch((err) => {
    console.log(`Some Error occured while connecting to mongoDB ${err}`);
  });

app.use(express.json()); // Make sure to include this as well
Note: Don't try to copy paste the cluster link, as I just pasted it for the purpose of this blog and will delete the cluster soon from my console.
Create the MongoDB models for the same inside ../server/models/user.js file
const mongoose = require("mongoose");

const userSchema = mongoose.Schema({
  name: {
    type: String,
    required: true,
  },
  email: {
    type: String,
    required: true,
  },
  profilePic: {
    type: String,
    required: true,
  },
});

const User = mongoose.model("User", userSchema);
module.exports = User;
Now create a ../server/routes/auth.js file inside the server directory and paste this code inside it.
const express = require("express");
const User = require("../models/user");
const authRouter = express.Router();

authRouter.post("/api/signup", async (req, res) => {
  try {
    const { name, email, profilePic } = req.body;

    let user = await User.findOne({ email });

    // Checking if the user already exists or not in the collec
    if (!user) {
      user = new User({
        name,
        email,
        profilePic,
      });
      user = await user.save();
    }

    res.json({ user });
  } catch (e) {
    res.status(500).json({ error: e.message });
  }
});

module.exports = authRouter;
The above code simply performs a post request in which it will first destructure the name, email and profile pic from the user's data and saves it inside the MongoDB database.
We have also implemented a separate router for the auth as well as for documents.
Include the authRouter inside the index.js file
app.use(authRouter);
Now the code which we have included inside the auth_repository.dart file will work properly and we're good to go.
Persisting the User State
So far we are done with the authentication in which we provided the facility of google sign to the user and stored all the necessary info inside the MongoDB Database.
Now the question of state persistence comes to mind, how are we gonna make the user stay signed in once they are logged in? For this we are going to use the concept of JSON Web Token and create an auth middleware, the below image is a simple explanation of how this works
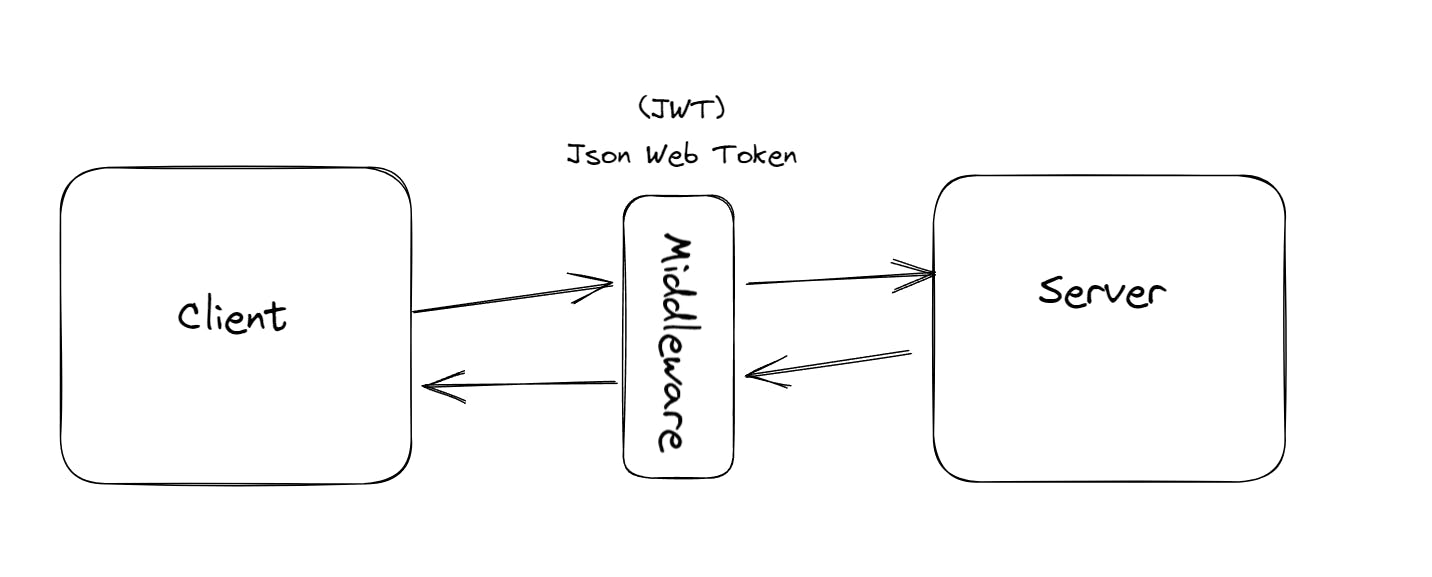
The JWT will stay inside the user's machine/device and every time the user will start the app, the JWT will get verified and it will make sure whether the user stays logged in or not.
Create a ../server/middleware/auth.js file inside the server directory.
Firstly install the jsonwebtoken dependency by running npm i jsonwebtoken
Then paste this code inside auth.js
const jsonToken = require("jsonwebtoken");

const auth = (req, res, next) => {
  try {
    const token = req.header("x-auth-token");

    if (!token) {
      return res.status(401).json({ msg: "No token found, access denied" });
    }
    const verified = jsonToken.verify(token, "passwordKey");
    if (!verified) {
      return res
        .status(401)
        .json({ msg: "Token verification failed, Authorization Denied" });
    }

    req.user = verified.id;
    req.token = token;
    next();
  } catch (e) {
    res.status(500).json({ error: e.message });
  }
};

module.exports = auth;
Now get all the users from the MongoDB database with the help of Tokens, navigate to ../server/routes/auth.js and print this and include this code as well
const auth = require("../middelware/auth");

authRouter.get("/", auth, async (req, res) => { // Providing the Auth Middleware
  const user = await User.findById(req.user);
  res.json({ user, token: req.token });
});
When the user is performing the post request, we are going to sign the token, so make sure to include this code inside the authRouter.post method after the if condition.
const jsonToken = require("jsonwebtoken");

 const token = jsonToken.sign({ id: user._id }, "passwordKey");
 res.json({ user, token });
The above code will be used to generate the JSON Web Token whenever the user performs the post request. Once the server generated the token, it will be forwarded to the user's machine by the server.
From the user side, we are going to use a flutter package called SharedPreferences with which we are going to store the JWT inside the user's machine.
So create a ../lib/repository/local_storage_repository.dart file and paste this code inside it.
import 'package:shared_preferences/shared_preferences.dart';

class LocalStorageRepository {
  void setToken(String token) async {
    SharedPreferences sharedPreferences = await SharedPreferences.getInstance();
    sharedPreferences.setString('x-auth-token', token);
  } // Sets the token with the name `x-auth-token`

  Future<String?> getToken() async {
    SharedPreferences sharedPreferences = await SharedPreferences.getInstance();
    String? token = sharedPreferences.getString('x-auth-token');
    return token;
  } // Returns the token to the end user with the help of the name
}
As you can see inside the AuthRepository code which you've written earlier and this all makes sense now.
Insert a new future method inside the auth_repository.dart file after the googleSignIn method
 Future<ErrorModel> getUserData() async {
    ErrorModel error = ErrorModel(error: 'Some error occured', data: null);
    try {
      String? token = await _localStorageRepository.getToken();

      if (token != null) {
        var res = await _client.get(
          Uri.parse('$host/'),
          headers: {
            'Content-Type': 'application/json; charset=UTF-8',
            'x-auth-token': token,
          },
        );

        switch (res.statusCode) {
          case 200:
            final newUser = UserModel.fromJson(
              jsonEncode(
                jsonDecode(res.body)['user'],
              ),
            ).copyWith(
              token: token,
            ); // setting the token here which we got from the previous response
            error = ErrorModel(error: null, data: newUser);
            _localStorageRepository.setToken(newUser.token);
            break;
        }
      }
    } catch (e) {
      error = ErrorModel(error: e.toString(), data: null);
    }

    return error;
  }

  void signOut() async {
    await _googleSignIn.signOut();
    _localStorageRepository.setToken('');
  }
In the above code, we are getting all the users and once we are successful with the GET request, then we are inserting the token inside the user model and then we are setting the user token as well.
We have also included the signout functions with which the user can sign out from the app and set the token to null.
Performing the routes
Throughout the app, we are going to use the Routemaster plugin, this plugin wraps around the normal navigator widget and provides some excellent features.
Create a home screen inside the ../lib/screens/ directory and paste this code
import "package:flutter/material.dart";
import "package:flutter_riverpod/flutter_riverpod.dart";
import "package:google_docs_clone/common/widgets/loader.dart";
import "package:google_docs_clone/models/DocumentModel.dart";

import "package:google_docs_clone/repository/AuthRepository.dart";
import "package:google_docs_clone/repository/documentRepository.dart";
import "package:google_docs_clone/utilities/colors.dart";
import "package:routemaster/routemaster.dart";

class HomeScreen extends ConsumerWidget {
  const HomeScreen({super.key});

  void signOut(WidgetRef ref) {
    ref.watch(authRepositoryProvider).signOut();
    ref.read(userProvider.notifier).update((state) => null);
  }

  @override
  Widget build(BuildContext context, WidgetRef ref) {
    return Scaffold(
      appBar: AppBar(
        backgroundColor: kWhiteColor,
        elevation: 0,
        actions: [
          IconButton(
            onPressed: () { /** further code **/ },
            icon: const Icon(
              Icons.add,
              color: kBlackColor,
            ),
          ),
          IconButton(
            onPressed: () { /** further code **/ },
            icon: const Icon(
              Icons.logout,
              color: kRedColor,
            ),
          ),
        ],
      ),
      body: FutureBuilder(
        future: null,
        builder: (context, snapshot) {
          if (snapshot.connectionState == ConnectionState.waiting) {
            return const Loader();
          }
          return Center(
            child: Container(
              width: 600,
              margin: const EdgeInsets.only(top: 10),
              child: ListView.builder(
                itemCount: snapshot.data!.data.length,
                itemBuilder: (context, index) {
                  // further code at later part
                },
              ),
            ),
          );
        },
      ),
    );
  }
}
Create a ../lib/router.dart file and paste this code inside it
import 'package:flutter/material.dart';
import 'package:google_docs_clone/screens/HomeScreen.dart';
import 'package:google_docs_clone/screens/login_screen.dart';
import 'package:routemaster/routemaster.dart';

final loggedInRoute = RouteMap(
  routes: {
    '/': (route) => const MaterialPage(child: HomeScreen(),),
  },
);

final loggedOutRoute = RouteMap(
  routes: {
    '/': (route) => const MaterialPage(
          child: LoginScreen(),
        ),
  },
);
Now inside the main.dart file, write this code 👇
import 'package:flutter/material.dart';
import 'package:flutter_riverpod/flutter_riverpod.dart';
import 'package:google_docs_clone/models/ErrorModel.dart';
import 'package:google_docs_clone/repository/AuthRepository.dart';
import 'package:google_docs_clone/router.dart';

import 'package:routemaster/routemaster.dart';

void main() {
  runApp(
    const ProviderScope(
      child: MyApp(),
    ),
  );
}

class MyApp extends ConsumerStatefulWidget {
  const MyApp({super.key});

  @override
  ConsumerState<MyApp> createState() => _MyAppState();
}

class _MyAppState extends ConsumerState<MyApp> {
  ErrorModel? errorModel;

  @override
  void initState() {
    super.initState();
    getUserData();
  }

  void getUserData() async {
    errorModel = await ref.read(authRepositoryProvider).getUserData();

    if (errorModel != null && errorModel!.data != null) {
      ref.read(userProvider.notifier).update((state) => errorModel!.data);
    }
  }

  @override
  Widget build(BuildContext context) {
    return MaterialApp.router(
      debugShowCheckedModeBanner: false,
      title: 'Google Docs Clone',
      theme: ThemeData(
        colorScheme: ColorScheme.fromSeed(
          seedColor: Colors.deepPurple,
        ),
        useMaterial3: true,
      ),
      routeInformationParser: const RoutemasterParser(),
      routerDelegate: RoutemasterDelegate(
        routesBuilder: (context) {
          final user = ref.watch(userProvider);
          if (user != null && user.token.isNotEmpty) {
            return loggedInRoute;
          }
          return loggedOutRoute;
        },
      ),
    );
  }
}
The above code simply implements the routing persistence inside the consumer stateful widget which will first get the user data and based on the user data will update the user model and inside the routerdelegate function it will check that if the user is not empty and the token is also set, then it will navigate to the loggedInroute or else it will be routed to the loggedoutroute
Once you finish the above code, you can check it and see if it runs as expected.
So we are done here and let's move to the next part of the blog 🔥
Creating Documents
Firstly we are going to perform the requests inside the server, so create a ../server/models/document.js file and create a document model as below 👇
const mongoose = require("mongoose");

const documentScheme = mongoose.Schema({
  uid: {
    required: true,
    type: String,
  },
  title: {
    required: true,
    type: String,
    trim: true,
  },
  createdAt: {
    required: true,
    type: Number,
  },
  content: {
    type: Array,
    default: [],
  },
});

const Document = mongoose.model("Document", documentScheme);

module.exports = Document;
This model will help us in getting the required field from the user side and storing the necessary data inside the database.
Now create a new document route inside the ./routes directory and name is document.js and paste the below code.
const express = require("express");

const Document = require("../models/document");

const auth = require("../middelware/auth");

const documentRouter = express.Router();

documentRouter.post("/doc/create", auth, async (req, res) => {
  try {
    const { createdAt } = req.body;
    let document = new Document({
      uid: req.user,
      title: "Untitled Document",
      createdAt,
    });

    document = await document.save();
    res.json(document);
  } catch (e) {
    res.status(500).json({ error: e.message });
  }
});

documentRouter.get("/docs/me", auth, async (req, res) => {
  try {
    let documents = await Document.find({ uid: req.user });
    res.json(documents);
  } catch (e) {
    res.status(500).json({ error: e.message });
  }
});

documentRouter.post("/doc/title", auth, async (req, res) => {
  try {
    const { id, title } = req.body;
    const document = await Document.findByIdAndUpdate(id, { title });

    res.json(document);
  } catch (e) {
    res.status(500).json({ error: e.message });
  }
});

documentRouter.get("/doc/:id", auth, async (req, res) => {
  try {
    const document = await Document.findById(req.params.id);
    res.json(document);
  } catch (e) {
    res.status(500).json({ error: e.message });
  }
});
module.exports = documentRouter;
The above document route contains all the necessary functions and implementations which we will need throughout the creation and updating of documents.
And don't forget to include it inside the index.js file
const cors = require("cors");
app.use(documentRouter);
app.use(cors());
So far we are done with the authentication part of the app and then implemented the state persistence throughout the app, we are now moving forward to the next part of the app which is creating the documents and displaying them back to the user.
Create a ../lib/models/document_model.dart file and paste this code inside it
import 'dart:convert';

class DocumentModel {
  final String title;
  final String uid;
  final List content;
  final DateTime createdAt;
  final String id;
  DocumentModel({
    required this.title,
    required this.uid,
    required this.content,
    required this.createdAt,
    required this.id,
  });

  Map<String, dynamic> toMap() {
    return {
      'title': title,
      'uid': uid,
      'content': content,
      'createdAt': createdAt.millisecondsSinceEpoch,
      'id': id,
    };
  }

  factory DocumentModel.fromMap(Map<String, dynamic> map) {
    return DocumentModel(
      title: map['title'] ?? '',
      uid: map['uid'] ?? '',
      content: List.from(map['content']),
      createdAt: DateTime.fromMillisecondsSinceEpoch(map['createdAt']),
      id: map['_id'] ?? '',
    );
  }

  String toJson() => json.encode(toMap());

  factory DocumentModel.fromJson(String source) =>
      DocumentModel.fromMap(json.decode(source));
}
Now create a ../lib/repository/document_repository.dart file and make sure to perform the get and post requests inside it, and also add the facility to update the title inside the same file as below 👇
import 'dart:convert';
import 'dart:developer';
import 'package:flutter_riverpod/flutter_riverpod.dart';
import 'package:google_docs_clone/constants.dart';
import 'package:google_docs_clone/models/DocumentModel.dart';
import 'package:google_docs_clone/models/ErrorModel.dart';
import 'package:http/http.dart';

final documentRepositoryProvider = Provider(
  (ref) => DocumentRepository(
    client: Client(),
  ),
);

class DocumentRepository {
  final Client _client;

  DocumentRepository({
    required Client client,
  }) : _client = client;

  Future<ErrorModel> createDocument(String token) async {
    ErrorModel error = ErrorModel(
      error: 'Some unexpected error occurred.',
      data: null,
    );
    try {
      var res = await _client.post(
        Uri.parse('$host/doc/create'),
        headers: {
          'Content-Type': 'application/json; charset=UTF-8',
          'x-auth-token': token,
        },
        body: jsonEncode(
          {
            'createdAt': DateTime.now().millisecondsSinceEpoch,
          },
        ),
      );
      switch (res.statusCode) {
        case 200:
          error = ErrorModel(
            error: null,
            data: DocumentModel.fromJson(res.body),
          );
          break;
        default:
          error = ErrorModel(
            error: res.body,
            data: null,
          );
          break;
      }
    } catch (e) {
      error = ErrorModel(
        error: e.toString(),
        data: null,
      );
    }
    return error;
  }

  Future<ErrorModel> getDocuments(String token) async {
    ErrorModel errorModel =
        ErrorModel(error: 'Some Unexpected Error Occured', data: null);
    try {
      var res = await _client.get(
        Uri.parse("$host/docs/me"),
        headers: {
          'Content-Type': 'applicaiton/json; charset=UTF-8',
          'x-auth-token': token,
        },
      );

      switch (res.statusCode) {
        case 200:
          List<DocumentModel> documents = [];

          for (int i = 0; i < jsonDecode(res.body).length; i++) {
            documents.add(
              DocumentModel.fromJson(
                jsonEncode(
                  jsonDecode(res.body)[i],
                ),
              ),
            );
          }
          errorModel = ErrorModel(
            error: null,
            data: documents,
          );
          break;
        default:
          errorModel = ErrorModel(
            error: res.body,
            data: null,
          );
          break;
      }
    } catch (e) {
      errorModel = ErrorModel(
        error: e.toString(),
        data: null,
      );
    }
    return errorModel;
  }

  void updateTitle({
    required String token,
    required String id,
    required String title,
  }) async {
    await _client.post(
      Uri.parse('$host/doc/title'),
      headers: {
        'Content-Type': 'application/json; charset=UTF-8',
        'x-auth-token': token,
      },
      body: jsonEncode({
        'title': title,
        'id': id,
      }),
    );
  }

  Future<ErrorModel> getDocumentById(String token, String id) async {
    ErrorModel error = ErrorModel(
      error: 'Some unexpected error occurred.',
      data: null,
    );
    try {
      var res = await _client.get(
        Uri.parse('$host/doc/$id'),
        headers: {
          'Content-Type': 'application/json; charset=UTF-8',
          'x-auth-token': token,
        },
      );
      switch (res.statusCode) {
        case 200:
          error = ErrorModel(
            error: null,
            data: DocumentModel.fromJson(res.body),
          );
          break;
        default:
          throw 'This Document does not exist, please create a new one.';
      }
    } catch (e) {
      error = ErrorModel(
        error: e.toString(),
        data: null,
      );
    }
    return error;
  }
}
The above code defines a Dart class named DocumentRepository, which acts as an intermediary between the Flutter application and an API server. It provides methods to interact with the server and perform various operations related to documents. The class has methods like createDocument, getDocuments, updateTitle, and getDocumentById.
The createDocument method sends a POST request to the API server to create a new document, passing the user's authentication token and the document creation timestamp. It expects a response from the server, and based on the HTTP status code, it returns an ErrorModel object containing either an error message or a DocumentModel object with the created document data.
The getDocuments method sends a GET request to the server to retrieve the user's documents, providing the authentication token. It processes the server's response, parses the JSON data, and returns an ErrorModel object containing either an error message or a list of DocumentModel objects representing the user's documents.
The updateTitle method sends a POST request to the server to update the title of a specific document, identified by its ID. It takes the authentication token, document ID, and the new title as input parameters.
The getDocumentById method sends a GET request to the server to retrieve a specific document identified by its ID. It expects the authentication token and document ID as input parameters and returns an ErrorModel object containing either an error message or an DocumentModel object with the retrieved document data. If the document doesn't exist, it throws an exception indicating the non-existence of the document.
Create a new file document_screen.dart inside the ./lib/screens directory and also add the routes as well inside the router.dart file
final loggedInRoute = RouteMap(
  routes: {
    '/': (route) => const MaterialPage(child: HomeScreen()),
    '/document/:id': (route) => MaterialPage(
          child: DocumentScreen(
            id: route.pathParameters['id'] ?? '',
          ),
        ),
  },
);
Pass an ID inside the document screen as well.
import 'dart:async';
import '../utilities/colors.dart';
import '../common/widgets/loader.dart';
import 'package:flutter/material.dart';
import 'package:flutter/services.dart';
import 'package:flutter_riverpod/flutter_riverpod.dart';
import 'package:routemaster/routemaster.dart';

class DocumentScreen extends ConsumerStatefulWidget {
  final String id;
  const DocumentScreen({
    Key? key,
    required this.id,
  }) : super(key: key);

  @override
  ConsumerState<ConsumerStatefulWidget> createState() => _DocumentScreenState();
}

class _DocumentScreenState extends ConsumerState<DocumentScreen> {
  @override
  Widget build(BuildContext context) {

    return Scaffold(
      appBar: AppBar(
        backgroundColor: kWhiteColor,
        elevation: 0,
        actions: [
          Padding(
            padding: const EdgeInsets.all(10.0),
            child: ElevatedButton.icon(
              onPressed: () {
               // Code to perform
                  },
                );
              },
              icon: const Icon(
                Icons.lock,
                size: 16,
              ),
              label: const Text('Share'),
              style: ElevatedButton.styleFrom(
                backgroundColor: kBlueColor,
              ),
            ),
          ),
        ],
        title: Padding(
          padding: const EdgeInsets.symmetric(vertical: 9.0),
          child: Row(
            children: [
              GestureDetector(
                onTap: () {
                  Routemaster.of(context).replace('/');
                },
                child: Image.asset(
                  'assets/images/docs-logo.png',
                  height: 40,
                ),
              ),
              const SizedBox(width: 10),
              SizedBox(
                width: 180,
                child: TextField(
                  controller: titleController,
                  decoration: const InputDecoration(
                    border: InputBorder.none,
                    focusedBorder: OutlineInputBorder(
                      borderSide: BorderSide(
                        color: kBlueColor,
                      ),
                    ),
                    contentPadding: EdgeInsets.only(left: 10),
                  ),
                  onSubmitted: (value) => updateTitle(ref, value),
                ),
              ),
            ],
          ),
        ),
        bottom: PreferredSize(
          preferredSize: const Size.fromHeight(1),
          child: Container(
            decoration: BoxDecoration(
              border: Border.all(
                color: kGreyColor,
                width: 0.1,
              ),
            ),
          ),
        ),
      ),
      body: Center(
        child: Column(
          children: [
            const SizedBox(height: 10),
            const SizedBox(height: 10),
            Expanded(
              child: SizedBox(
                width: 750,
                child: Card(
                  color: kWhiteColor,
                  elevation: 5,
                  child: Padding(
                    padding: const EdgeInsets.all(30.0),
                    child: null,
                  ),
                ),
              ),
            )
          ],
        ),
      ),
    );
  }
}
The screen for the document has been designed successfully. Now we can redirect from the home screen to the document screen.
Go to the homescreen.dart file
// Include this method above the build method
 void navigateToDocument(BuildContext context, String documentID) {
    Routemaster.of(context).push('/document/$documentID');
  }

// Update this widget
 IconButton(
            onPressed: () => createDocument(context, ref),
            icon: const Icon(
              Icons.add,
              color: kBlackColor,
    ),
),

// Also implement the signout functionality
IconButton(
            onPressed: () => signOut(ref),
            icon: const Icon(
              Icons.logout,
              color: kRedColor,
    ),
),
Getting all the documents
Now its time to display all the created documents, the creation facility of documents we implemented in the previous section, now we are showing all the created documents inside the home screen file
Update the future builder which we created earlier
 FutureBuilder(
        future: ref.watch(documentRepositoryProvider).getDocuments(
              ref.watch(userProvider)!.token,
            ),
        builder: (context, snapshot) {
          if (snapshot.connectionState == ConnectionState.waiting) {
            return const Loader();
          }
          return Center(
            child: Container(
              width: 600,
              margin: const EdgeInsets.only(top: 10),
              child: ListView.builder(
                itemCount: snapshot.data!.data.length,
                itemBuilder: (context, index) {
                  DocumentModel document = snapshot.data!.data[index];

                  return InkWell(
                    onTap: () => navigateToDocument(context, document.id),
                    child: SizedBox(
                      height: 50,
                      child: Card(
                        child: Center(
                          child: Text(
                            document.title,
                            style: const TextStyle(
                              fontSize: 17,
                            ),
                          ),
                        ),
                      ),
                    ),
                  );
                },
              ),
            ),
          );
        },
),
The above code will first display all the documents to us and then when we click on any specific document, it will redirect us to the document inside the document screen with the help of the specific document id.
Implementing Flutter Quill
Now inside the document screen, we do need a certain type of editor inside which we can write our docs, so we are going to take the help of flutter_quill which provides us with good UI to write documents and with all the necessary functionalities as well.
you can check it out here 👇
Now I am not going to show you how to implement it as the documentation is pretty much easy to get started with it, but provide you with the link to the main code in which I implemented it.
https://gist.github.com/hasnainmakada-99/cb2fe8301f76857971e40469cf32f677
Implementing Sockets
Now the most important part of the application comes, what are we gonna do to make it a collaborative editor, we are going to take the help of sockets here, Sockets are nothing but packets of data and requests from the server to multiple end devices.
If I am editing the document from my PC, then my server sockets will make sure that the change is getting back reflected to all of my devices from which I have access to the document. It's just getting the packets and delivering them to many devices.
Go to index.js file and implement the sockets, but remember to install them first from here ➡️ https://www.npmjs.com/package/socket.io
var http = require("http");
var server = http.createServer(app);
var io = require("socket.io")(server);

io.on("connection", (socket) => {
  socket.on("join", (documentId) => {
    socket.join(documentId);
  });

  socket.on("typing", (data) => {
    socket.broadcast.to(data.room).emit("changes", data);
  });

  socket.on("save", (data) => {
    saveData(data);
  });
});

const saveData = async (data) => {
  let document = await Document.findById(data.room);
  document.content = data.delta;
  document = await document.save();
};
The above code opens up a socket first by calling the connection parameter. Then it will join the socket room with the particular document ID passed, after then the rest of the methods call the saveData function which will constantly save the document at every interval of time.
Inside your Flutter app, create a ../lib/client/socket_client.dart file and paste the below code inside it 👇
import 'package:google_docs_clone/constants.dart';
import 'package:socket_io_client/socket_io_client.dart' as io;

class SocketClient {
  io.Socket? socket;

  static SocketClient? _instance;

  SocketClient._internal() {
    socket = io.io(host, <String, dynamic>{
      'transports': ['websocket'],
      'autoConnect': false,
    });
  }

  static SocketClient get instance {
    _instance ??= SocketClient._internal();
    return _instance!;
  }
}
Install the socket io flutter client 👇
Create a socket repository inside the repository directory
import 'package:google_docs_clone/client/socket_client.dart';
import 'package:socket_io_client/socket_io_client.dart';

class SocketRepository {
  final _socketClient = SocketClient.instance.socket!;

  Socket get socketClient => _socketClient;

  void joinRoom(String documentID) {
    _socketClient.emit("join", documentID);
  }

  void typing(Map<String, dynamic> data) {
    _socketClient.emit("typing", data);
  }

  void autoSave(Map<String, dynamic> data) {
    _socketClient.emit("save", data);
  }

  void changeListener(Function(Map<String, dynamic>) func) {
    _socketClient.on("changes", (data) => func(data));
  }

  // One is used to send data from the server to the client  ---> Server emits to client
  // emit is used to send data from the client to the server ---> Client emits to server
}
Now we are going to implement these sockets inside the document screen and I am not going to show you how to implement them but provide you directly the link to the code
Here's the link to the gist
https://gist.github.com/hasnainmakada-99/cb2fe8301f76857971e40469cf32f677
Final Output
Here's the link to the final output of our app
https://drive.google.com/file/d/1AqNmmpFNaaIFgv9Qov8HeCRn0walRwmW/view?usp=sharing
Wrapping Up
Finally, we came to the end of this blog, I really hope that now you are confident enough to create a big complex application using Flutter easily. A big shoutout to Rivaan Ranawat for creating a video tutorial on this as well, you can check out his video here as a reference.
If you have any more doubts related to Flutter and DevOps, feel free to reach out at X.com and Showwcase
Till then, Happy Coding 😀