

Set up a CI pipeline in your Flutter apps with GitHub Actions
In this blog, I am going to explain how you can set up a CI pipeline in your flutter apps with the help of GitHub Actions.

As a 22-year-old Computer Engineer, my enthusiasm lies in open-source development, particularly with Flutter. Actively contributes to "Open Source with Hasnain," channelling efforts to craft high-performance applications. Beyond technical expertise, a forward-thinking tech vision propels towards continuous growth and innovation.
Introduction
Hey everyone I am Hasnain Makada, Currently building out OSWH where every beginner can find various resources related to their specific field and they can also start their open-source journey by solving issues and providing relevant content in the project.
In this mini blog today, I will teach you how to build a CI pipeline in your flutter apps by leveraging GitHub Actions, which will build the app and upload its APK to GitHub releases.
Let's get started
Open your terminal and create a new flutter project by running flutter create flutter_ci_test. Wait for some time and your project will be created successfully.
For this blog, we will use the boilerplate code generated by flutter (A simple counter app), build an apk and release it on GitHub.
Make sure to Git initialize your flutter project (Run git init).
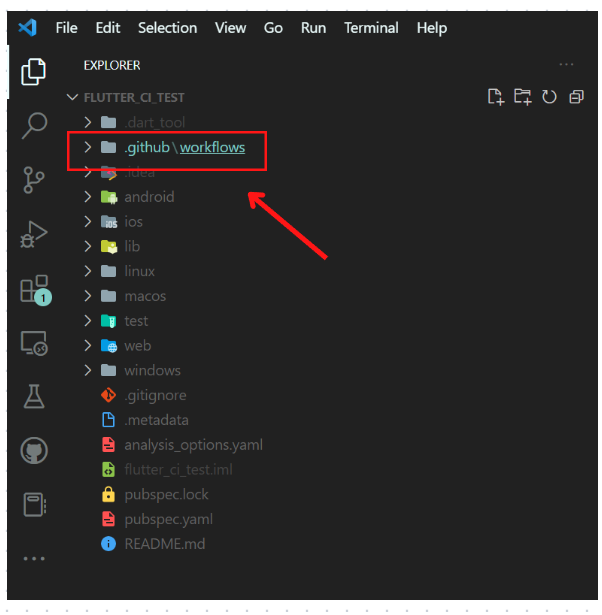
Create a new .github directory in the root of the project and inside that directory create another workflows directory.
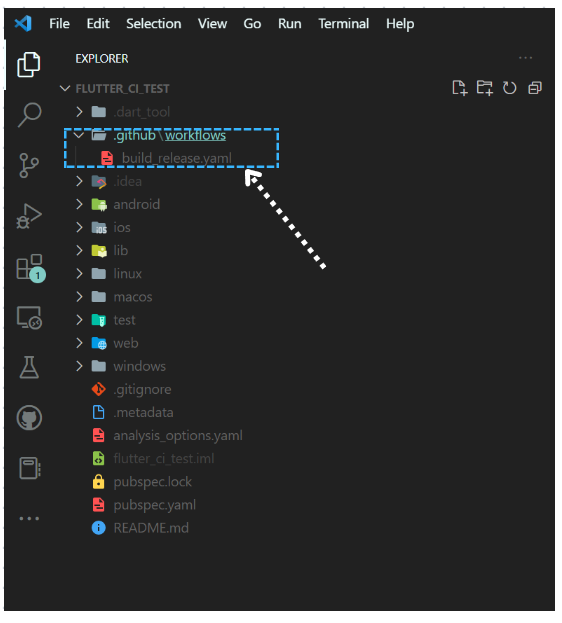
Now create a build_release.yaml file inside the workflows directory. You can name the file with whichever name you want to but for this blog purpose I named it buil_release.yaml.
Inside the YAML file, paste this GitHub Actions workflow code,
name: Build and Release Flutter app

on:
  push:
    branches:
      - "master"

jobs:
  test:
    runs-on: ubuntu-latest
    steps:
      - name: Checkout Code
        uses: actions/checkout@v3

      - name: Setup Flutter
        uses: subosito/flutter-action@v2
        with:
          channel: "stable"
          flutter-version: "3.7.0"

      - name: Build Apk
        run: flutter build apk
        env:
          FLUTTER_STAGE: "production"

      - name: Deploy APK to GitHub Releases
        uses: actions/upload-artifact@v3
        with:
          name: app-release.apk
          path: build/app/outputs/apk/release/app-release.apk
Now let's try to understand the above actions workflow step-by-step
name- Indicated the name of the GitHub Workflowon- Indicates the workflows to run at certain operations, we have specified the workflow to run whenever there is a new push to the master branch. you can specify your main branch also.jobs- Here the main procedure starts to build the apk and release it.test- Tests the app andruns-onubuntu (VM).steps- Indicates the start of the procedureThe first procedure/step will check out the main flutter code with the help of
action/checkout@v3action. This action is basically used in all workflows whenever we are testing, building or deploying. It is used to look up the code of the project.After then it will set up a flutter environment for the project with the
subosito/flutter-action@v2action with a stable channel and with the latest version of flutter.It will then start building the APK for the app in production
Lastly, it will upload the built apk inside GitHub releases with the help of
actions/upload-artifact@v3action where we have specified the name and the path where the apk is stored in our project.
Upload all your code inside your GitHub repository and wait for the workflow to run successfully.

After the actions have been successfully executed, click on the workflow run and you can see that it has created the artefacts for the app.

You can also modify the actions to upload the artefacts on Play Store as soon as it has been created. It totally depends on how you want them to work for you.
For reference, check out the GitHub repository used in this project. Link
Conclusion
I hope that by now you must have gotten an idea of how to set up flutter apps with GitHub actions and make your life easier with the help of CI/CD. If you have any more queries related to it, feel free to reach out on Twitter and Showwcase


